

You are using an out of date browser. It may not display this or other websites correctly.
You should upgrade or use an alternative browser.
You should upgrade or use an alternative browser.
Enforcer Project renamed, Junk Yard Dog.
- Thread starter blazeracer
- Start date
blazeracer
New member
Crusader said:James...I bought both my cloth and epoxy resin from AeroMarine....I found them to be the least expensive of all the companies I researched. They are based out of California and have very fast shipping.
Check my Amazon link, its Aeromarine.. LOL How much resin did you go through?
blazeracer
New member
Gonna paint the trailer while the boat's off of it. I peeled off all the reflective decals, and there is a good three coats of paint on this sucker now. There is a sand blasting shop two doors down from my shop. The guy told me $200 - $250 to blast it down to bare metal. Is that a good deal?

stickman07
New member
Absolutely. Shop here in Temple will blast & paint for $3-500. Black or white only.
Sent from my iPhone 4S bought with UNION Dollars ! 🇺🇸🚒
Sent from my iPhone 4S bought with UNION Dollars ! 🇺🇸🚒
blazeracer
New member
I have blue paint left from the boat. It will be painted to match. The rims on the trailer are chrome steel modulars that someone painted black. I'm going to strip the paint off of them and hope they still look good.

Crusader
Moderator
blazeracer said:I have blue paint left from the boat. It will be painted to match. The rims on the trailer are chrome steel modulars that someone painted black. I'm going to strip the paint off of them and hope they still look good.
I used a paint stripper gel to strip my last pair of rims....worked really well and I was done in a short period of time.....easy to use......just don't get it on your skin, that stuff burns like crazy.
blazeracer
New member
Trailer's stripped down and going in to get blasted. Gonna replace the bunks while they're off also.
blazeracer
New member
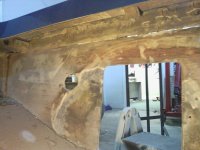
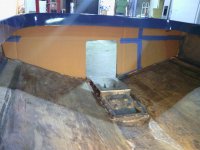
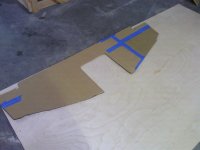
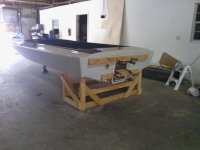
Got the new transom in today. Mocked it with card board. Drew on the ply. Cut it out with an electric sabre saw, test fit, trim, test fit again, glass it in.
Attachments
blazeracer
New member
Pulled the clamps off of the transom this morning. It's ROCK SOLID now. Proceeded to remove the rest of the stringers which was easy enough since there were no longer bonded to the floor. The next part was possible the worst boat work I have ever done. Using my 40 grit flapper wheel take all the fiberglass tabs and stringer adhesive out getting it all down the bare glass floor. I cleaned it up all the way to the front of the bow. Has to wear a respirator rather than a dust mask in there it was so thick. Once that was done I traced the shape of the old stringers onto the new wood and cut them out. Skill saws don't like turning corners. They are pretty good now. I'll make some minor adjustments in the morning, then make a couple of jigs to hold them straight and get them glued to set overnight.
You can see the notch in the right side stringer for water drainage. That Kona thread on PB the guy did his like that. Looks like a good way to prevent any future rot to me. Could have gotten more done today, but it's time to head to the Rangers game for dollar hot dog night.
You can see the notch in the right side stringer for water drainage. That Kona thread on PB the guy did his like that. Looks like a good way to prevent any future rot to me. Could have gotten more done today, but it's time to head to the Rangers game for dollar hot dog night.
Crusader
Moderator
SPD said:Every piece of wood in my Kona is notched like that for drainage . Just make sure you seal the wood where the cut outs are .
X2..
I had to drill a hole near the rear of my stringers to allow for drainage.
Nice work James!!!!! Be sure to round the top edges of your stringers before applying the fiberglass cloth and resin....that will help ensure that there's no bubbles or lifting in the cloth material. Cloth will form better on a curved surface rather than a sharp 90 degree surface.
blazeracer
New member
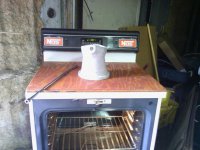
You read my mind.. Went to Harbor Freight and got a 1/4 round bit for my router and a dolly to hold a stove. First order of the day, get an old beater oven ready for powder coating. Took this one and gutted all the switches and wiring for the stove top, covered the holes with some stickers, and added a wood work deck to the top. Then took said dolly and screwed it to the bottom so it's easy to roll around.
After that rounded the tops of the stringers and worked on shaping them some more. I think they're ready to get glued down. I'll make jigs in the morning, stick down the stringers and get to powder coating pump parts. The powder from Eastwood arrived today.
After that rounded the tops of the stringers and worked on shaping them some more. I think they're ready to get glued down. I'll make jigs in the morning, stick down the stringers and get to powder coating pump parts. The powder from Eastwood arrived today.

blazeracer
New member
I got a couple of pump pieces media blasted last week, then the blast cabinet broke. It will be an easy $2 fix, just have to do it. I'm gonna powder coat the droop today just cause I have to at least do one piece to test it.
If the hammer hadn't gone through the stringer it would be almost back together by now. The extra work will thank me by making the hull stronger and a hundred pounds lighter.
If the hammer hadn't gone through the stringer it would be almost back together by now. The extra work will thank me by making the hull stronger and a hundred pounds lighter.
blazeracer
New member
Learned a couple things about powder coating. It's awesome and it's easy.
1. Going to powder coat the droop snoot for my first piece. It's media blasted and ready.
2. Wash it with acetone, bake it at 450 for 20 minutes, let it cool and wash it with acetone again.
3. Ready to go using a Harbor Freight powder coat system I bought using a 20% off super coupon, and Eastwood dark Ford blue powder.
4. All powdered up and ready for the over. This was so easy. Just step on the current pedal, pull the trigger on the gun and fog the powder onto the piece.
5. Put in an your over at 450* until the powder flows out (goes from dull to shiny), then reduce the temp to 400* for 20 minutes and remove the piece. Let it cool for a long long time.
6. Here's how it matches up with the blue on the boat.
7. For smaller item remove the racks and hang the pieces from the top of the oven.
8. Here's what got done today.
1. Going to powder coat the droop snoot for my first piece. It's media blasted and ready.
2. Wash it with acetone, bake it at 450 for 20 minutes, let it cool and wash it with acetone again.
3. Ready to go using a Harbor Freight powder coat system I bought using a 20% off super coupon, and Eastwood dark Ford blue powder.
4. All powdered up and ready for the over. This was so easy. Just step on the current pedal, pull the trigger on the gun and fog the powder onto the piece.
5. Put in an your over at 450* until the powder flows out (goes from dull to shiny), then reduce the temp to 400* for 20 minutes and remove the piece. Let it cool for a long long time.
6. Here's how it matches up with the blue on the boat.
7. For smaller item remove the racks and hang the pieces from the top of the oven.
8. Here's what got done today.
Attachments
soldier of fortune
New member
nice where did you get the powder at?
blazeracer
New member
soldier of fortune said:nice where did you get the powder at?
Had to order from the Eastwood website
http://www.eastwood.com/hotcoat-powder-coating/powders.html
I couldn't find anywhere around here that sold it other than Harbor Frieght and their colors are real limited. The one by my house only has white, yellow, black and red. Same with the one in Richardson also.