
Devilman
Well-known member
Coming to you live from the south.... :wink: :grin:
That aside... as some of you may have read, I pulled the pump outta the boat to have it gone through. Main reason is that I've been running it since I bought it (2005) with no prior knowledge or maintenance history on it. Grease pukes out of it like chicks at a redneck keg party so I figure at the very least it will end up with new seals & bearing & not be so messy back there around the engine. :cheesy:
This is not meant to be a step by step instructional thread per se, as Duane will be the one going through it. If he wants to make one out of it showing disassembly & stuff, that's fine. Duane you can chime in however. I am mainly posting to show what I did & found so far.
Started by unhooking control cables (steering, forward/reverse, & diverter) & then pullin the droop/diverter off.
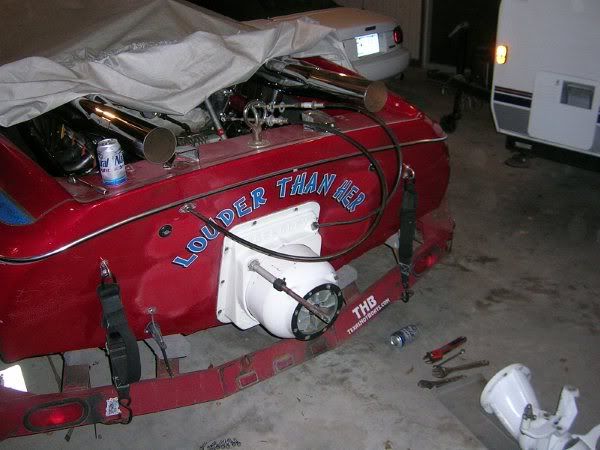
Moved on to the transom cover/adaptor next, which came off surprisingly well.

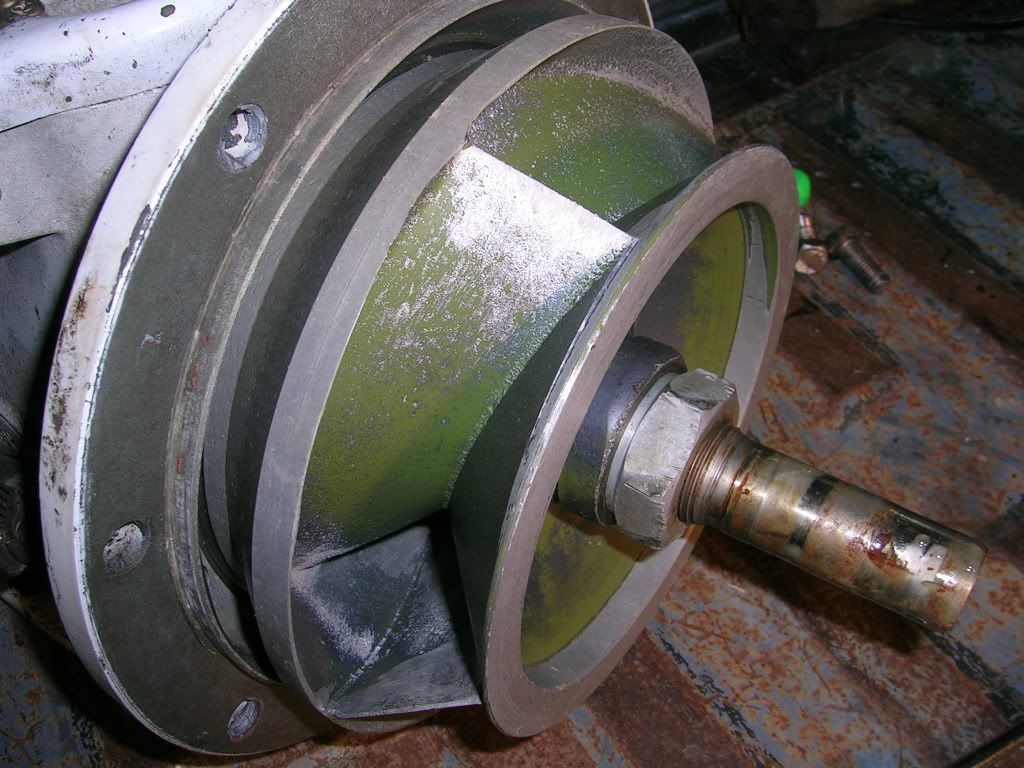
After that & removing the pump bolts the greasy, dirty biatch is out on the ground... :wink:
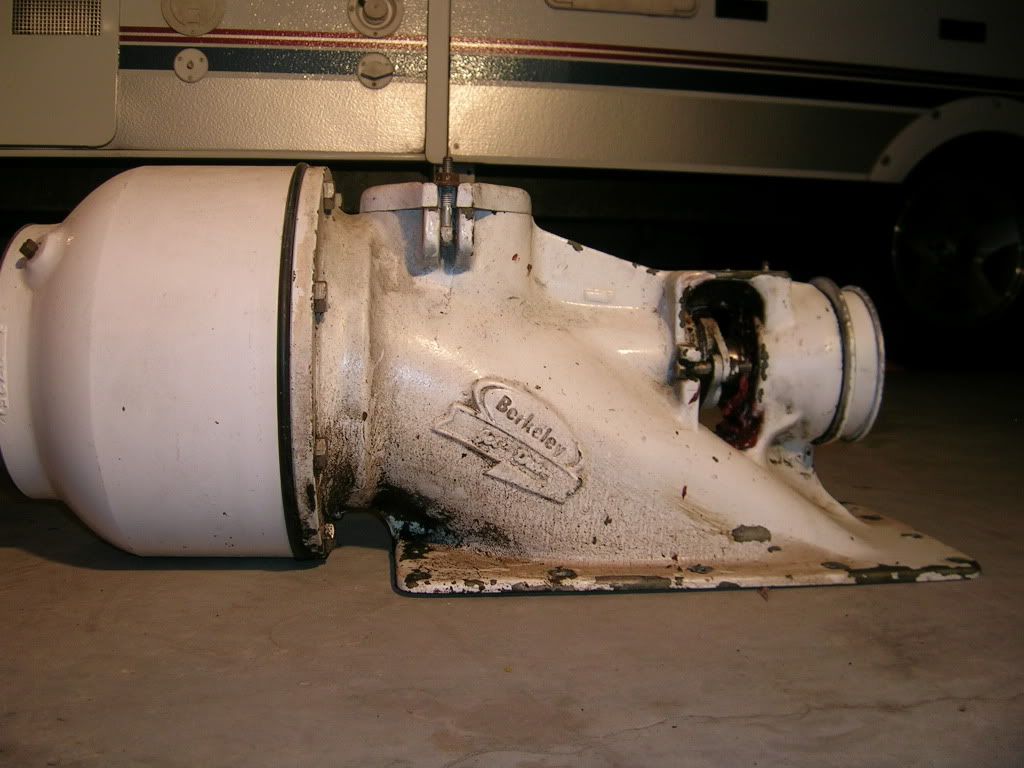
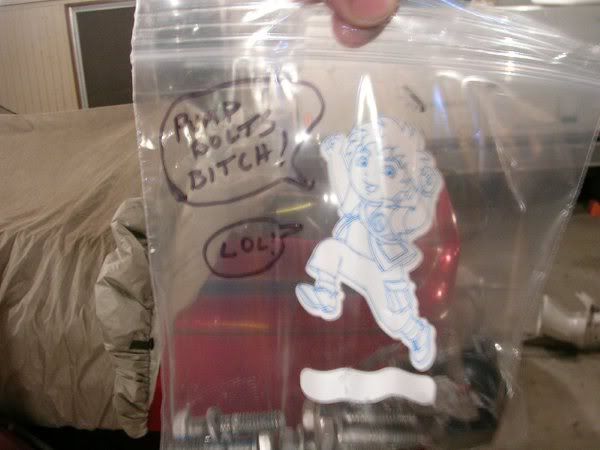
I'll also say that using anti-sieze on the hardware made removing the pump a snap. Everything came apart smoothly & looks as good as it did when I put the pump back in it in '05. Worth mentioning is that labeling & using a Ziploc bag for storage is a good way to keep track of all your hardware. As you can see, my granddaughter likes Dora stuff, lol... :cheesy:
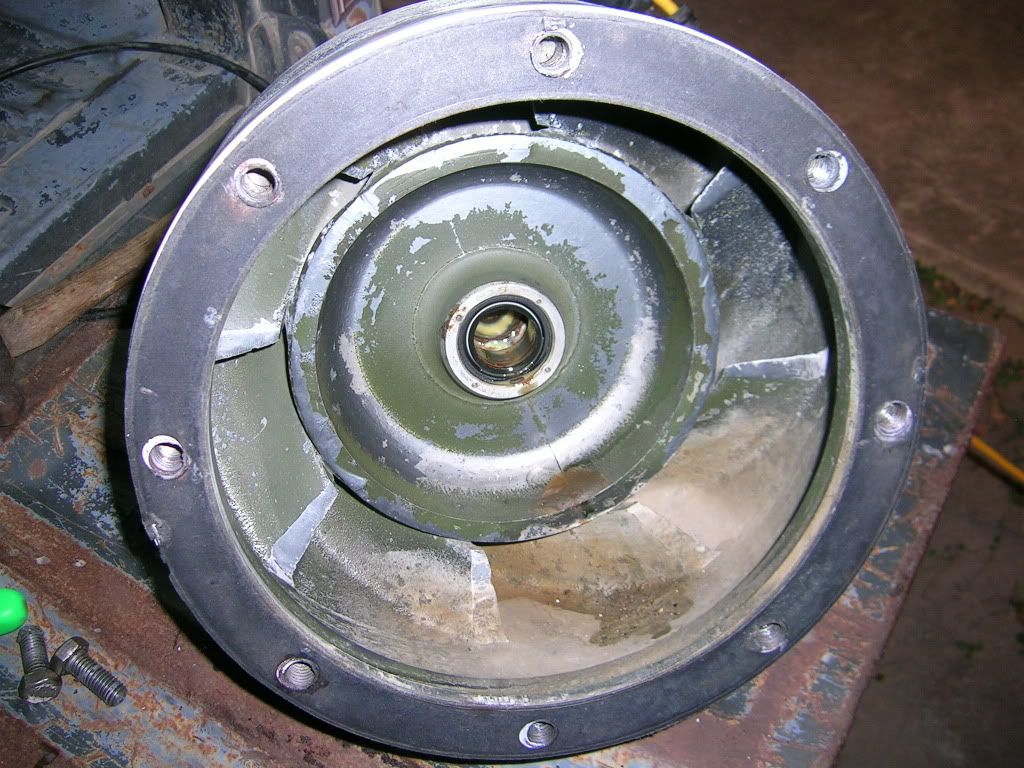
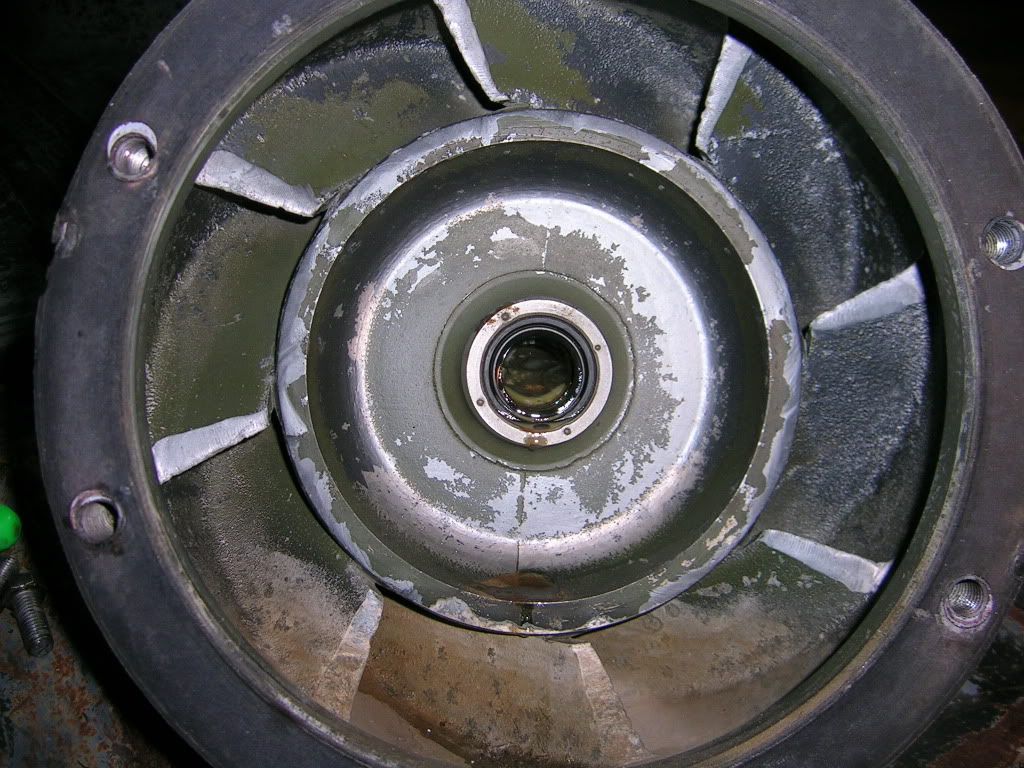
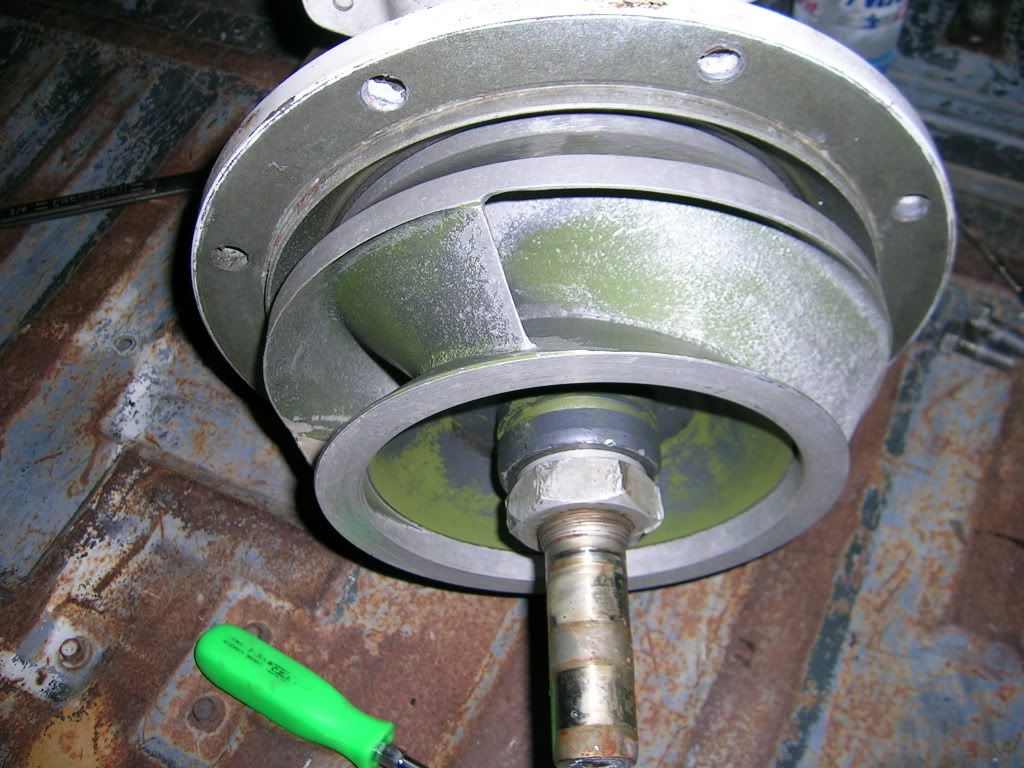
Once I had the pump out, I did pop the bowl off to see what I could see. To my untrained eye, it looks as good as it did when I bought it, other than some nicks in the leading edges of some of the vanes. Somebody else may notice something I may be missing.
Guess if I was gonna go with a stuffer plate, now would be the time. Anybody have any thoughts on that?
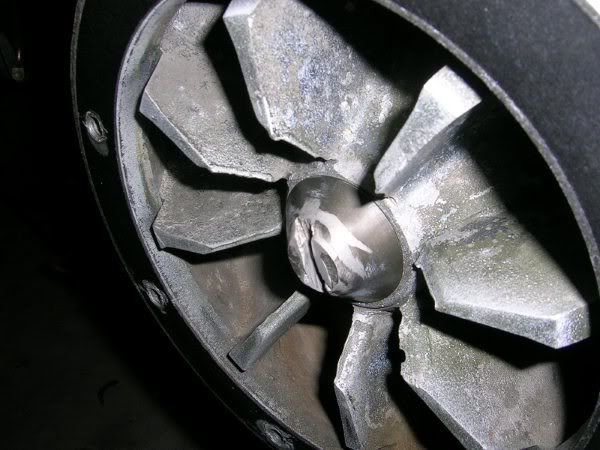
Vanes on the exit side don't look too awful bad, there is a few nicks/gouges though. Not sure if its anything to attend to or not?
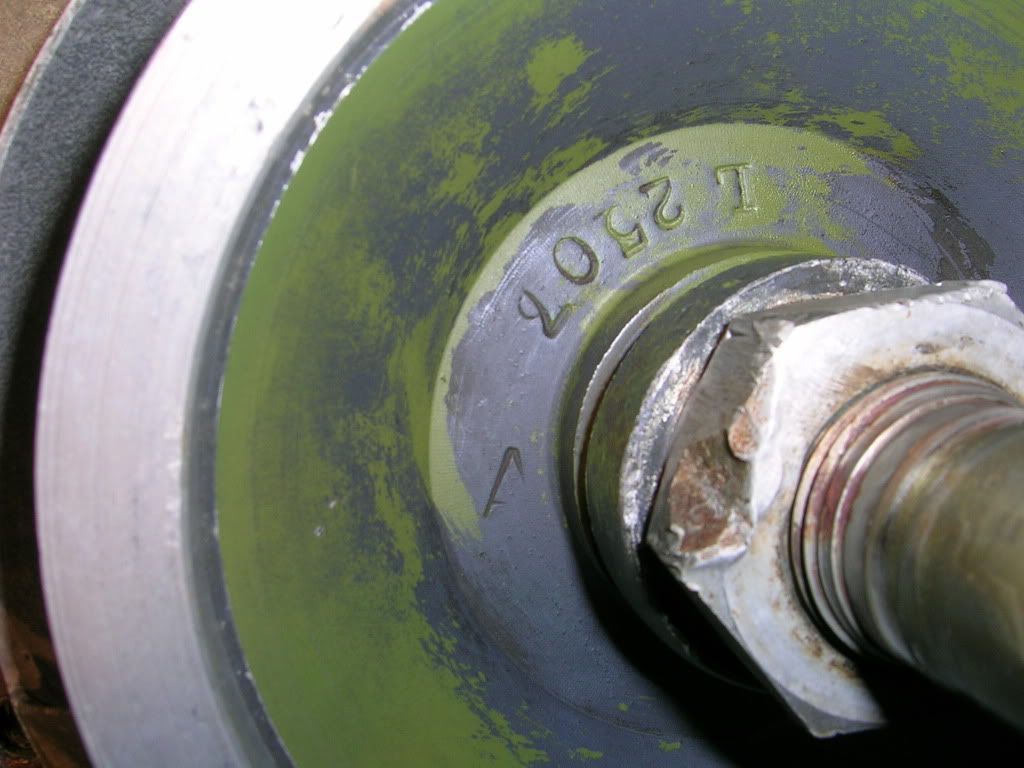
This all I've seen of the impeller so far. Haven't noticed any cracks or outstanding damage(so far, lol). Guessing it's an A by this stamping...
Got some pics of the loader too since I was right there. I'll post those soon & see if its a bad mofo or just a POS, lol. :grin:
That aside... as some of you may have read, I pulled the pump outta the boat to have it gone through. Main reason is that I've been running it since I bought it (2005) with no prior knowledge or maintenance history on it. Grease pukes out of it like chicks at a redneck keg party so I figure at the very least it will end up with new seals & bearing & not be so messy back there around the engine. :cheesy:
This is not meant to be a step by step instructional thread per se, as Duane will be the one going through it. If he wants to make one out of it showing disassembly & stuff, that's fine. Duane you can chime in however. I am mainly posting to show what I did & found so far.
Started by unhooking control cables (steering, forward/reverse, & diverter) & then pullin the droop/diverter off.
Moved on to the transom cover/adaptor next, which came off surprisingly well.
After that & removing the pump bolts the greasy, dirty biatch is out on the ground... :wink:
I'll also say that using anti-sieze on the hardware made removing the pump a snap. Everything came apart smoothly & looks as good as it did when I put the pump back in it in '05. Worth mentioning is that labeling & using a Ziploc bag for storage is a good way to keep track of all your hardware. As you can see, my granddaughter likes Dora stuff, lol... :cheesy:
Once I had the pump out, I did pop the bowl off to see what I could see. To my untrained eye, it looks as good as it did when I bought it, other than some nicks in the leading edges of some of the vanes. Somebody else may notice something I may be missing.
Guess if I was gonna go with a stuffer plate, now would be the time. Anybody have any thoughts on that?
Vanes on the exit side don't look too awful bad, there is a few nicks/gouges though. Not sure if its anything to attend to or not?
This all I've seen of the impeller so far. Haven't noticed any cracks or outstanding damage(so far, lol). Guessing it's an A by this stamping...
Got some pics of the loader too since I was right there. I'll post those soon & see if its a bad mofo or just a POS, lol. :grin:


